Master Bath – Redesigned with Purpose
When it came to redesigning this master bath, the homeowners had a few specific goals in mind: update the entire bathroom, maximize space, and rethink functionality. We’ll reveal how we met their design goals and created a spa oasis they will enjoy for years to come.
Goal #1: Update the look
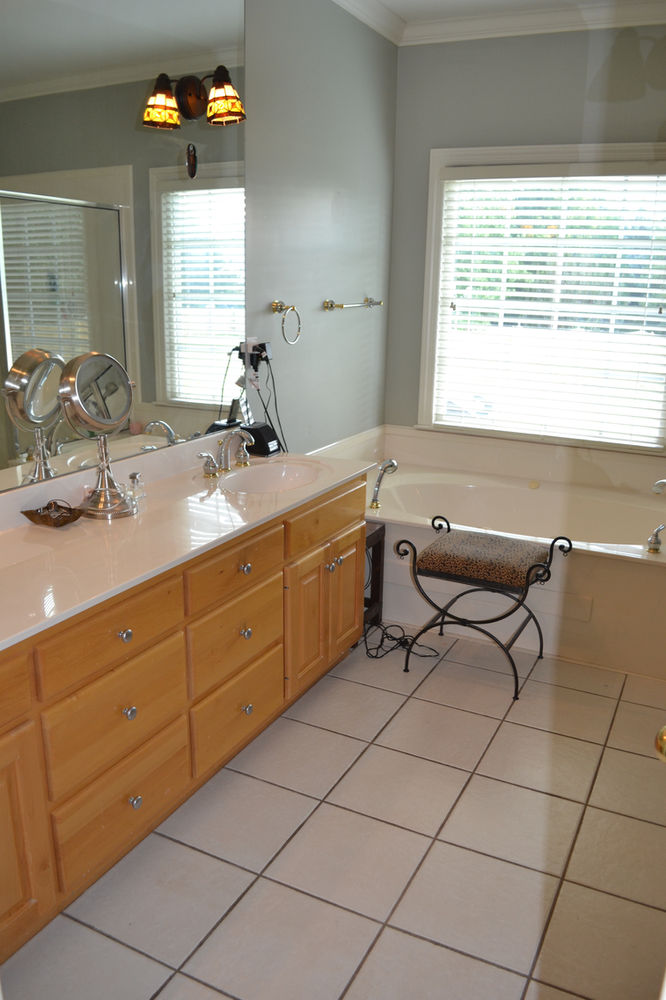
Before.
At the top of the list was updating the look of their entire bath. Everything from new floors, cabinets, countertops, lighting, plumbing fixtures, and bathtub was carefully thought through. Since most of the home had recently been updated to a semi-contemporary/transitional look, they wanted to carry that theme into the master bath. The creation of a “spa-like” feel with straight lines and soft tones of grey were accomplished by using “river rock” striated 12″ x 24″ porcelain tiles on the floor and walls, dark transitional-style cabinets, stand-alone tub, polished chrome hardware and fixtures, patterned accent wall in the shower and small circular tiles on the shower floor.
Goal #2: Make it look larger
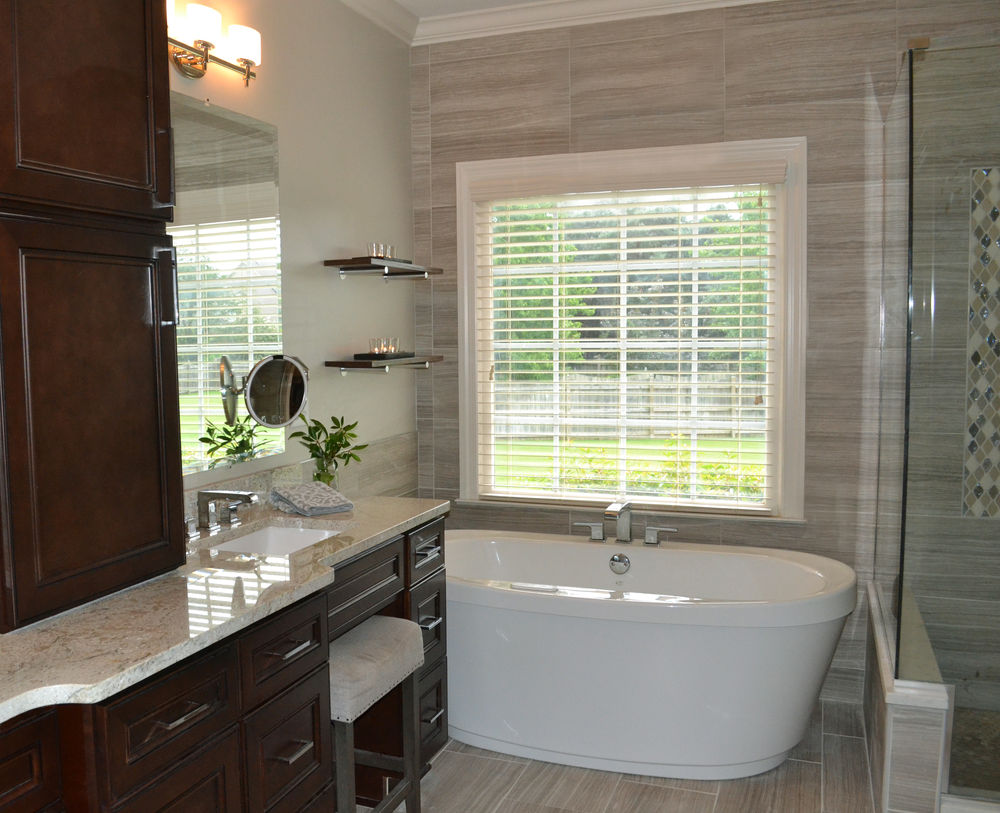
After.
Since expanding their bathroom was not an option, the goal was to work with the existing space to make it look as large as possible. One of the ways we achieved this was by selecting a larger tile with soft interwoven lines and installing them vertically on the floor, giving the illusion that the room was deeper. We also ran the same tiles horizontal on the walls in order to make the room seem wider and larger rather than tall and narrow. By removing the tub deck and replacing it with a stand-alone tub, we created a more usable space in the corner. It also allowed us to make the cabinet vanity area larger.
Goal #3: More storage and functional space
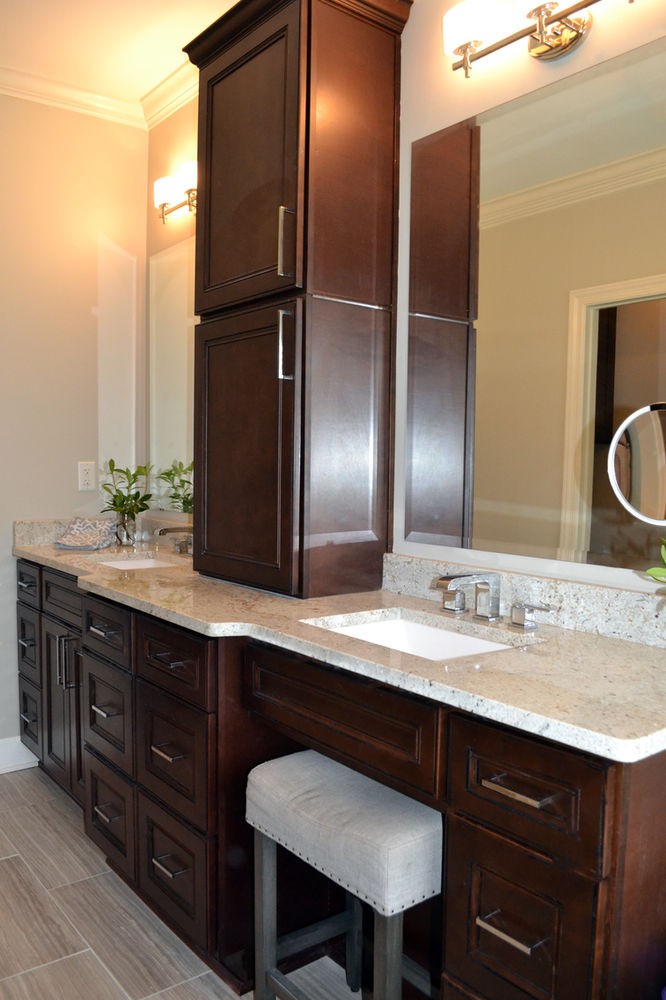
After.
Before this master bath remodel, there was not enough functional storage space. They wanted more storage above the countertops so everyday toiletries could be easily accessible and more drawer space to store hair styling accessories. He wanted a 36″ high cabinet and she wanted a space to sit at and get ready, so we custom designed the perfect marriage of a kitchen-height countertop for him and knee space for her. By removing the old tub, we were able to add more drawer space for both of them.
Goal #4: Enlarge the shower
As you can see there was not much room to expand the shower, so shrinking the tub area allowed us a few extra inches to make the shower larger. By using larger tiles along the tub/shower wall and changing out the glass walls, it made the shower area feel much larger.
Goal #5: Special features in the shower
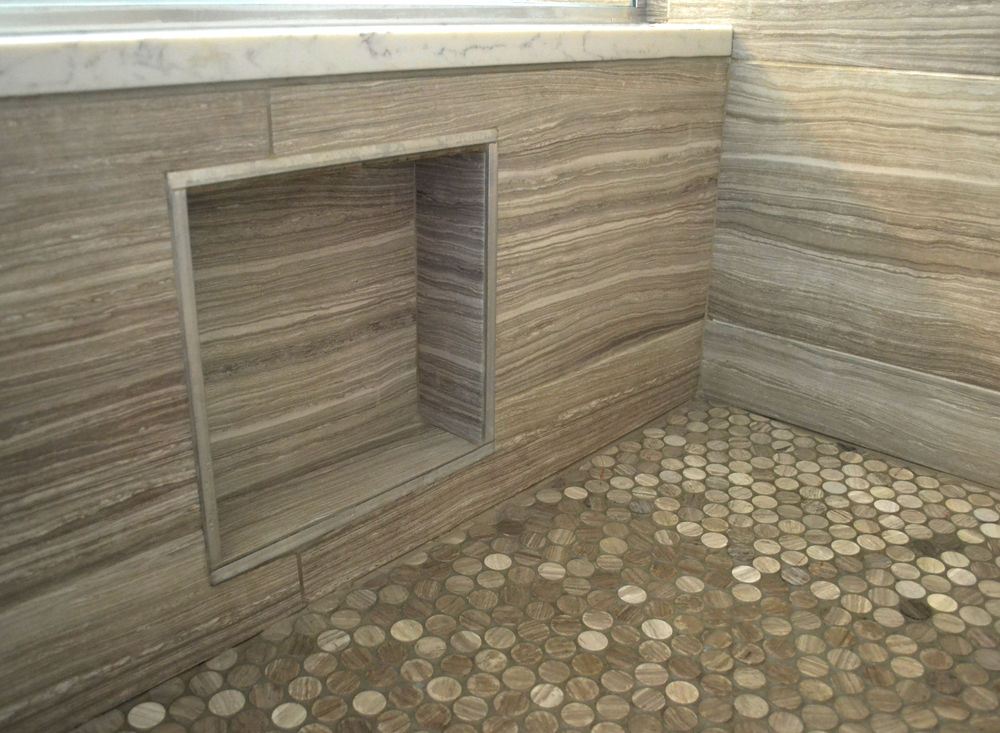
If you’re a woman, you’ll totally understand this request – a hidden place to put your shampoo and conditioner bottles and a comfortable place to put your foot while shaving your legs. We made a small “foot wall” along the tub side of the shower to hide the shower accessories and make those every day tasks a little easier.
At the end of the day, this redesigned master bath was exactly what these homeowners had in mind. If you have similar goals or questions regarding this project, please give us a call 256.536.8086 or come see us Haley’s Flooring and Interiors.